What Is the Purpose of Coffee Cupping? The Short Answer
What is the purpose of coffee cupping? It is a controlled way to compare coffees while keeping the brewer from taking over the result. You steep each sample in the same kind of bowl, with the same coffee-to-water ratio, grind, water, temperature, and timing, then judge how the cups differ.
That makes cupping useful for a specific question: is the difference coming from the coffee itself, or from the way it was brewed? If three bowls share a protocol and one smells fruitier, tastes sweeter, or shows a defect that the others do not, you have a better reason to investigate the bean, roast, processing, or storage before blaming your pour-over technique.
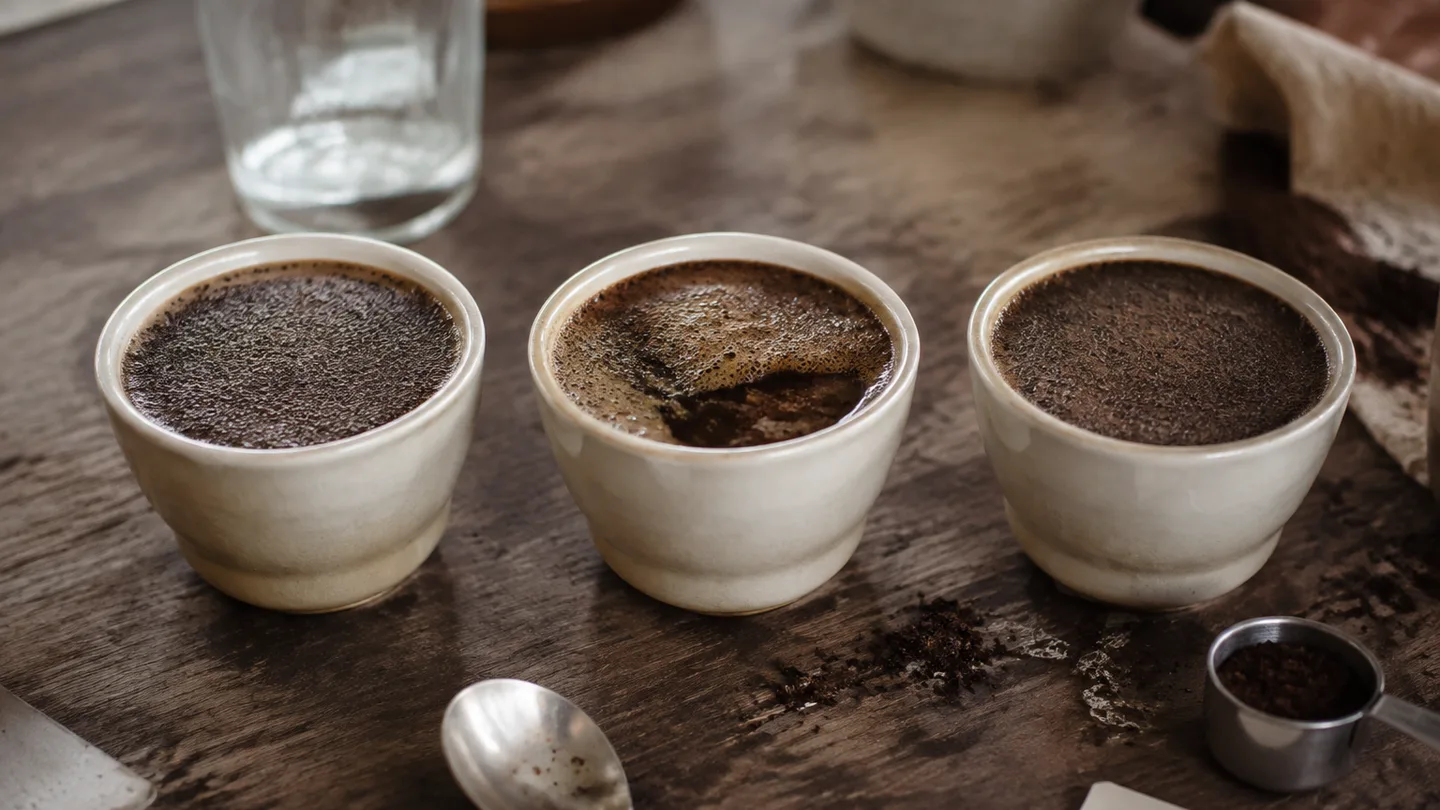
The short answer: cupping isolates the coffee from the brewer
Coffee cupping is a side-by-side sensory comparison. You assess aroma, flavor, acidity, sweetness, body, finish, and defects under shared conditions. Here, body means the weight or texture of the coffee on your tongue, while finish means the flavor that remains after you swallow or spit.
The purpose is not to create the most delicious serving recipe for every coffee. It is to create a repeatable reference point. A V60 depends on pouring speed and bed shape; espresso depends on pressure, puck preparation, and flow; cupping removes or reduces those brewer-specific variables so the samples can be judged on more equal terms.
A brew ratio is the amount of dry coffee compared with the amount of water. For a practical cupping baseline, use about 8.25 grams of coffee with roughly 150 milliliters, or 150 grams, of water. That works out to approximately a 1:18 ratio: one part coffee to about eighteen parts water.
Use water around 92–96°C, leave the floating crust undisturbed until roughly four minutes, then break it, skim the surface, and begin tasting as the coffee cools. A useful tasting window is about 8–12 minutes after pouring. Treat those numbers as a comparison frame, not as a recipe to copy directly into a V60 or espresso machine.
That distinction matters. A coffee can smell excellent in the bowl and still taste sour or thin through a paper filter if the brew under-extracts it. Cupping tells you what is present under a shared protocol; it does not remove the need to diagnose extraction in the brewer you actually use.
Why identical bowls, grind, and water make differences visible
Standardization is not ceremony for its own sake. It is a way to shrink the list of possible explanations. If every sample receives the same dose, water volume, grind setting, water chemistry, temperature, vessel, and contact time, a difference has fewer places to hide.
| Variable held steady | Why it matters |
|---|---|
| Coffee mass and water volume | Changes concentration and keeps the brew ratio comparable. |
| Grind setting | Keeps particle size and exposed surface area in the same range. |
| Water and temperature | Prevents mineral content or heat from becoming the hidden variable. |
| Vessel and timing | Limits differences in heat loss and contact time. |
| Agitation and skimming | Stops one sample from receiving more disturbance or floating sediment. |
For a home flight, three to six samples is a workable range. Three cups are enough to expose a clear contrast without making the session unwieldy; six can show a pattern across several coffees, although your attention has more notes to hold at once.
Cupping also changes the extraction problem by using immersion. The grounds sit in the water rather than depending on a stream passing through a filter bed, so flow rate and pouring technique play a smaller role. That does not make the brew variable-free, but it makes the comparison easier to repeat.
The lack of a paper filter is another deliberate difference. Paper catches much of the coffee oil and fine sediment, while a cupping bowl leaves more of both in the liquid until you skim or let particles settle. The result can feel heavier or more textured than a paper-filtered brew, which is one reason a bowl sample should not be treated as a direct forecast of a V60.
Identical bowls cannot rescue careless preparation. A grinder that retains yesterday’s dark roast, a kettle that cools between samples, or a different pour pattern can still blur the comparison. Cupping works because the protocol makes those errors visible and repeatable, not because the bowl is somehow immune to them.
The 4-to-12-minute window: fragrance, crust, slurp, and cooling
A cupping session has several sensory checkpoints. Each one answers a slightly different question, so the process is more informative than taking one sip and writing down a score.
- Before pouring: Smell the dry grounds. This gives you an early look at the coffee’s fragrance, because volatile aromatic compounds are already leaving the ground particles. The impression may be floral, cocoa-like, spicy, nutty, fermented, or muted, but it is not yet the aroma of the brewed cup.
- Immediately after pouring: Smell the wet grounds and surface. Water changes which compounds move into the liquid and which reach your nose. A floating layer of wet coffee particles forms what tasters call the crust, and it holds aromatic material close to the surface.
- At about four minutes: Break the crust with a spoon and lean in as the aroma rises. Moving through the floating layer releases trapped volatile compounds and gives you a strong moment for judging fragrance. Do it the same way for every bowl.
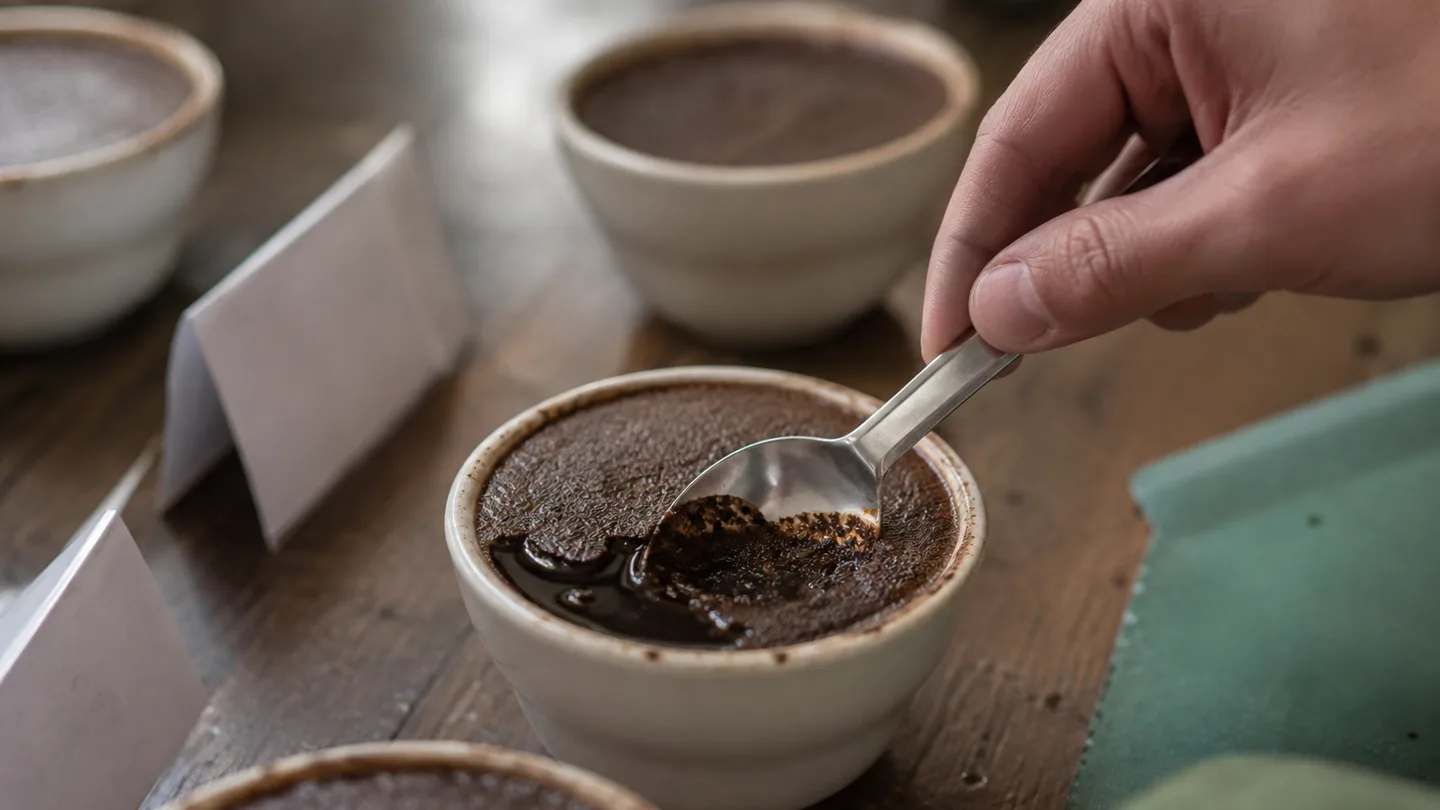
- After breaking: Skim the floating grounds and foam so you can taste with less loose material on the surface. You do not need to make the bowl perfectly clear; the goal is to handle each sample consistently.
- During tasting: Slurp rather than taking a quiet sip. A slurp spreads a thin spray of coffee across more of your mouth while pulling air through the liquid, which carries aromatic compounds toward your nose. The noise is functional, not a performance.
- As the coffee cools: Taste more than once. Cooling changes volatility and sensory perception, while the grounds may continue extracting until they are removed or settle. Acidity and aroma may become clearer, sweetness may become easier to separate from roast flavor, and bitterness or drying astringency may become more obvious.
The best note is not always the first one. A coffee that seems sharp when hot may become sweet and structured at a lower temperature; another that smells impressive at the crust break may lose its character quickly. The World Coffee Research Sensory Lexicon can help you find more specific language than simply writing good, bad, or fruity.
For a useful record, write the aroma first, then describe acidity, sweetness, body, finish, and any defect-like impression. Add whether the note grows, fades, or changes as the cup cools. That last part turns cupping from a vocabulary exercise into a comparison of behavior.
What cupping can prove—and what it cannot predict in a V60 or espresso
Cupping earns its keep wherever you need to compare coffee rather than serve it. It can help separate lots, assess roast development, check whether a blend is behaving consistently, notice storage-related dullness, and identify flavors that suggest a processing or roasting defect. The common thread is control: each sample receives the same treatment.
It is especially useful when several coffees seem similar in a normal brew. A pour-over can hide differences behind pouring skill, filter choice, drawdown speed, and uneven flow. In a cupping flight, those variables are reduced, so a contrast in acidity, sweetness, aroma, or texture is easier to notice.
But the ratios and extraction conditions are not interchangeable. The cupping baseline above is near 1:18. A broad home filter starting range may sit around 1:15–1:17, while an espresso starting point might use 18 grams of dry coffee to produce about 36 grams of liquid, or roughly a 1:2 beverage ratio. These are starting zones, not laws; the coffee, grinder, water, basket, and desired strength all affect the useful setting.
Grind size, pressure, filtration, contact time, and flow change how water reaches and dissolves material from the coffee particles. A paper filter removes more fines and oils than a mesh screen. Espresso pushes water through a compact bed under pressure, while cupping leaves the grounds immersed. The same bean can therefore express different strengths and textures in each method.
- Sour and thin: Often points first toward under-extraction, where too little soluble material has moved into the drink. In a brewer, check grind, contact time, and water temperature before declaring the coffee poor.
- Bitter and drying: Can point toward over-extraction or uneven extraction, especially if some parts of the bed are receiving much more water than others.
- Muddy: May come from fine particles and oils, excessive agitation, or filtration that lets more sediment through. A muddy cupping bowl and a muddy French press share some mechanics, but a muddy V60 may suggest a different flow or filter problem.
The practical conclusion is simple: cupping reveals sensory potential and problems under a shared test. It does not promise that your espresso, V60, moka pot, or French press will taste the same. Cupping is a control sample, not a serving recommendation.
A three-cup home test: 8.25 g, 150 g, 4 minutes, one variable
You can demonstrate the purpose of cupping tonight with three identical bowls or mugs, a scale, one grinder setting, and the same water. The cleanest test compares three coffees while keeping the method fixed. If you want to test a brewing variable instead, use one coffee in three bowls and change only that variable.
- Set up the cups. Label three bowls A, B, and C. Use vessels of similar size and material, and place them where you can smell and taste without moving them around.
- Weigh the dose. Start with 8.25 grams of coffee and about 150 grams of water per bowl. If your scale only measures whole grams, choose a dose you can repeat and multiply it by roughly eighteen for the water. Consistency is more valuable here than pretending a small decimal is precise.
- Grind once and distribute. Use the same grind setting for every sample. Grind each coffee separately, clear the grinder as consistently as you can, and avoid changing the setting between bowls if the coffee is the variable under test. A coffee grind size chart is useful later when you move from comparison to brewer-specific adjustment.
- Heat and pour. Use water in the 92–96°C range. Pour enough to wet all the grounds, then fill each bowl to the same target mass. Start a timer for each bowl if the pours are staggered; the important comparison is the time since that bowl was filled.
- Break at four minutes. Leave the crust alone until about four minutes. Break it with the same number and style of spoon passes for every cup, smell the released aroma, then skim floating grounds and foam.
- Taste twice. Begin around 8–10 minutes, slurping a small amount from each bowl. Taste again around 12–15 minutes. Note what changes as the samples cool instead of trying to force one permanent verdict.
- Write descriptive notes. Record aroma, acidity, sweetness, body, finish, and any specific impression such as papery, phenolic, fermenty, hollow, dry, or vegetal. Add one sentence about whether the note becomes stronger or weaker as the cup cools.
To keep the experiment honest, choose the comparison before you pour. Three different beans with one shared protocol tests the coffees. One bean at three grind settings tests grind size. One bean at three water temperatures tests heat. If dose, grind, water, and temperature all change together, you may produce an interesting flight, but you will not know which change caused the difference.
Use this interpretation order:
- If one sample alone shows a harsh, stale, papery, or fermented character, investigate that coffee’s bean, roast, processing, or storage first, then repeat the test before making a quality verdict.
- If every cup has the same dull, sharp, or drying problem, inspect the shared water and protocol before blaming all three coffees.
- If the cups differ clearly but a coffee that tastes good in cupping performs badly in your brewer, move to an extraction diagnosis. Check the coffee to water ratio calculator, grind, flow, and contact time for that method.
- If the three cups seem almost identical, do not invent a winner. The coffees may genuinely be close, or the shared water, grind, or roast level may be masking the contrast.
The most useful cupping result is often a controlled negative: if all three bowls share the same flaw, stop changing beans and inspect the shared conditions. That is why cupping is more than coffee tasting. It gives you a cleaner starting point for deciding which dial deserves your next adjustment.
Can you use a French press for coffee cupping?
Yes, for an informal comparison, provided you use the same French press and the same procedure for every sample. Pressing and mesh filtration change how many fines and oils remain in the cup, so a French-press comparison is useful but not identical to bowl cupping.
Is coffee cupping the same as coffee tasting?
Cupping is a standardized form of coffee tasting built for side-by-side evaluation. Coffee tasting is the broader activity and can include brewed coffee, espresso, milk drinks, or a looser set of notes without a shared protocol.
Do cupping scores tell you which coffee you will like best?
No. A score summarizes observed attributes and defects under a particular method. Your preference may favor a coffee with more roast character, heavier body, brighter acidity, or a processing note that another taster rates less highly. Use the score as information about the sample, not as an instruction about your taste.
For a formal terminology reference, compare your notes with the Specialty Coffee Association cupping protocol. For everyday brewing, keep the lesson narrower: cup to separate coffee differences from brewing errors, then return to your chosen brewer and adjust extraction there.
Frequently Asked Questions
Can you use a French press for coffee cupping?
Yes, for an informal comparison, but use the same French press and procedure for every sample. Pressing and mesh filtration change the amount of fines and oils in the cup, so a French-press comparison is not identical to bowl cupping.
Is coffee cupping the same as coffee tasting?
Cupping is a standardized form of coffee tasting designed for side-by-side evaluation. Coffee tasting is the broader activity and can include brewed coffee, espresso, milk drinks, or unstructured sensory notes.
Do cupping scores tell you which coffee you will like best?
No. A cupping score summarizes observed attributes and defects under a shared protocol; personal preference can still favor a lower-scoring coffee with a particular roast profile, acidity, body, or processing character.