Coffee Cupping: A 10-Minute Protocol for Comparing Beans
Use 8.25 g of coffee and 150 g of water per cup, then taste from 8:00 to 10:00. That gives you a repeatable home coffee cupping ratio of about 1:18.2, with enough time to compare aroma, acidity, sweetness, body, and finish as the cups cool.
The useful detail is visible at the counter: three identical cups, the scale settled at the same dose, and one timer running from the instant water touches the grounds. Hold those inputs steady and a difference in the cup is easier to connect to the bean rather than to a stray pour or an uneven dose.
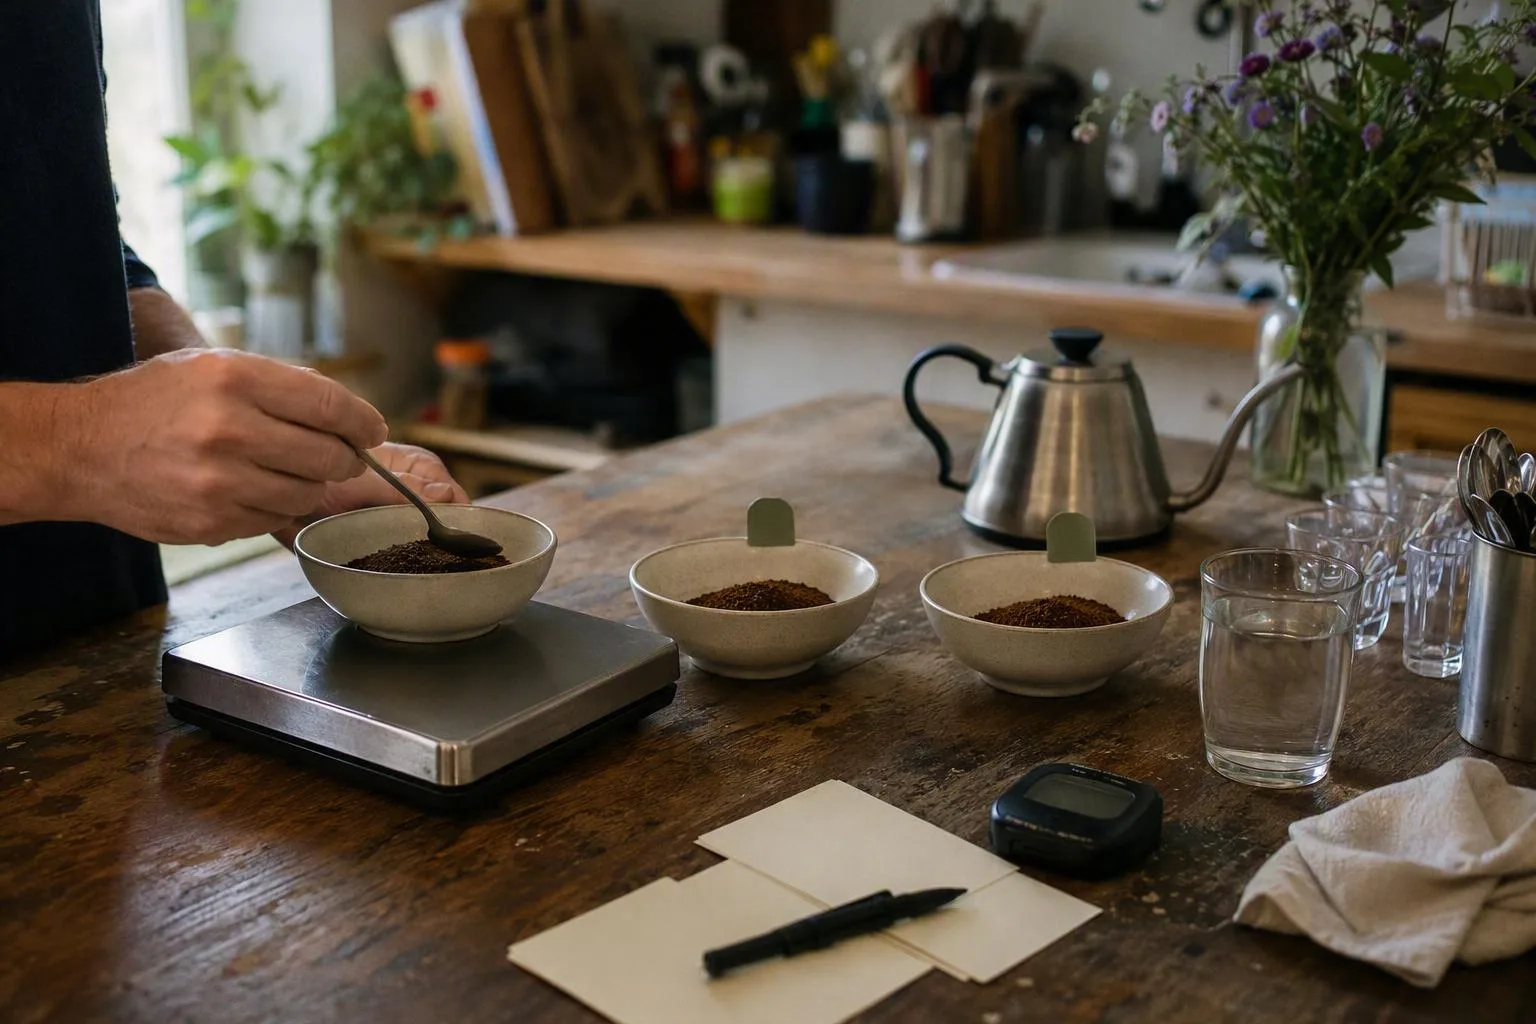
A fair test starts with 8.25 g, 150 g, and identical cups
Set up three samples if you can. Two cups work, but three gives you a useful middle reference and makes it easier to spot one cup that was prepared badly. Use heat-safe cups or bowls with a capacity of roughly 200–250 ml, and choose vessels with the same shape so aroma and cooling are not changed by the container.
A brew ratio is the relationship between the mass of coffee and the mass of water. Here, 8.25 g of coffee divided into 150 g of water gives 1:18.2 when written as coffee to water. If you want to scale the setup for more or fewer cups, use the coffee to water ratio calculator, then keep the ratio identical for every sample.
- Coffee: 8.25 g per cup, ground at the same medium-coarse setting.
- Water: 150 g per cup at roughly 92–96°C.
- Vessels: identical 200–250 ml heat-safe cups or bowls.
- Tools: a scale readable to 0.1 g, a timer, and two clean cupping spoons.
- Labels: mark the cups with letters or numbers before grinding so you do not rely on memory.
This is a practical SCA-style baseline, not a sacred recipe. The point is not that 8.25 g is the one correct dose; the point is that the same dose, water mass, grind, cup shape, and temperature remove preparation noise from the comparison.
Cupping is immersion: the grounds sit in the water instead of being rinsed through a paper filter in stages. That means there is no separate coffee bloom or pour pattern to control. You are comparing the beans through the same steeping environment, which is why this method is especially useful when the question is, What changes between these coffees?
The clock is the method: 0:00 through 10:00
Prepare every cup in the same order. If you cannot pour three cups quickly, use a separate timer for each bowl and record its pour time. A ten-second difference is manageable; losing track of which cup has been steeping longest is not.
- About 1 minute before brewing: Grind each dose and smell the dry grounds. Look for broad impressions such as cocoa, toasted grain, citrus peel, dried fruit, or herbs. Do not force a precise flavor name yet; the dry smell is a reference point for what changes after wetting.
- At 0:00: Start the timer when water first touches the coffee. Pour 150 g into each cup within roughly 8–10 seconds. Wet all the grounds, but do not stir. A slow or uneven pour can create a different wetting history between bowls, which defeats the comparison.
- From 0:00 to 4:00: Leave the crust undisturbed. The floating layer of grounds, foam, and trapped gas forms a temporary lid over the surface. Resist the urge to poke it early; early agitation adds a variable that every cup may not receive equally.
- At 4:00: Break the crust with three gentle spoon strokes while smelling the wet aroma. Push through the surface and draw the spoon toward you rather than whipping the coffee around. This is the most aromatic moment of the routine because the break exposes compounds that have been held near the surface.
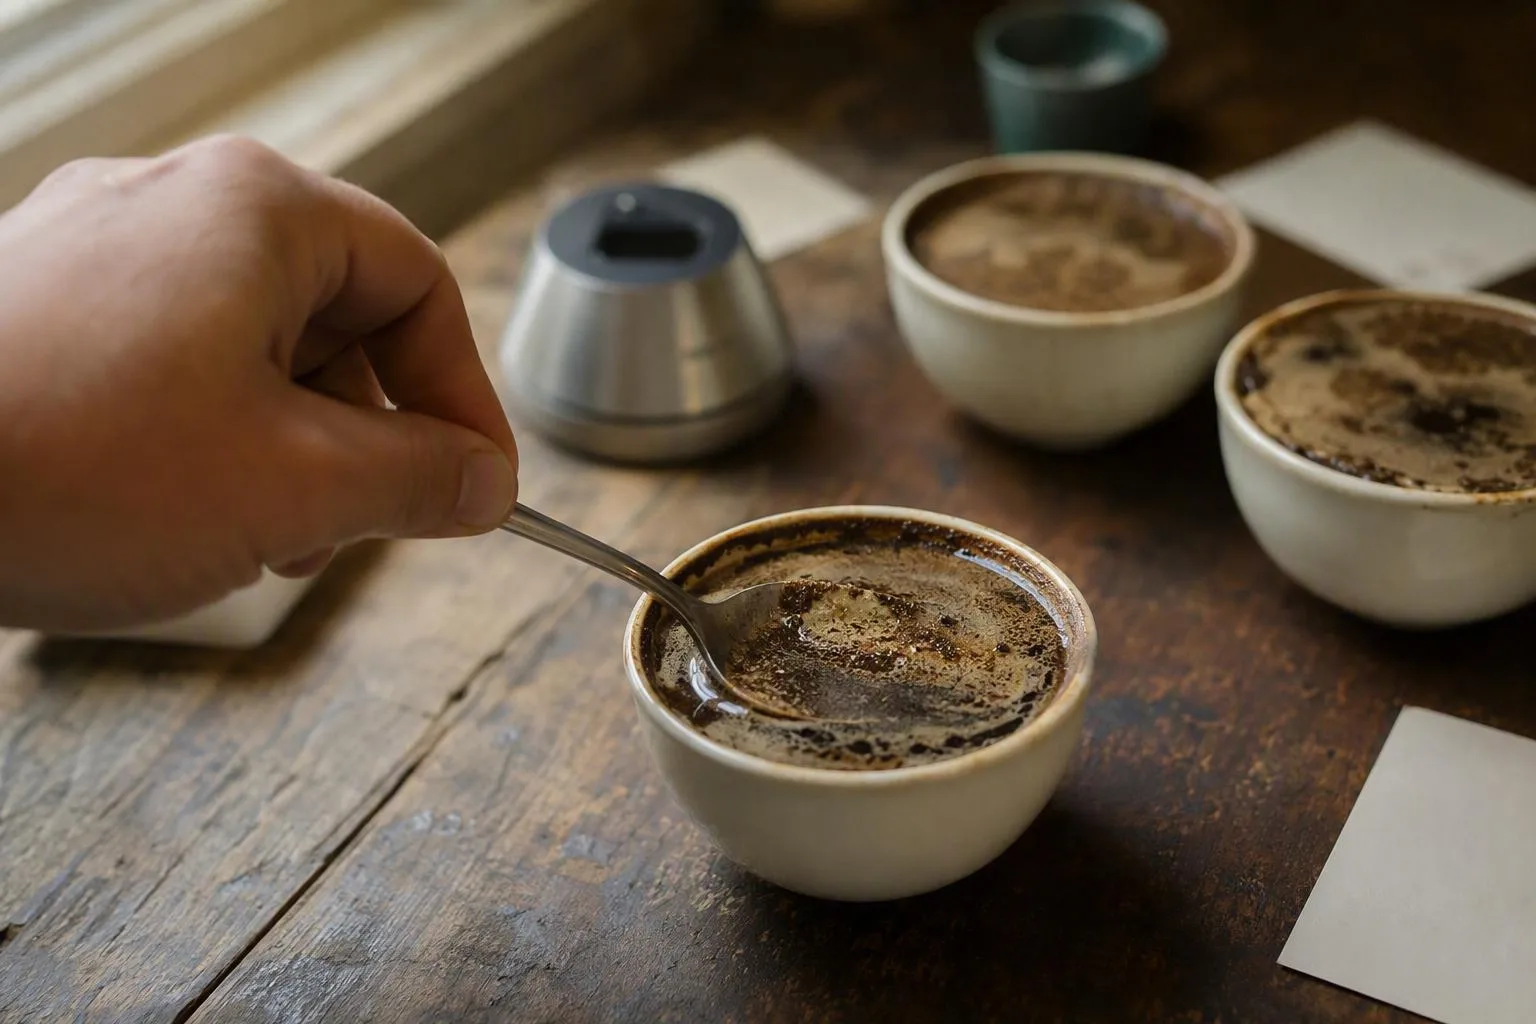
Volatile aroma compounds are molecules that readily move from the liquid or grounds into the air. Breaking the crust disturbs the surface and carries those compounds toward your nose, so smell as you make the strokes and again immediately afterward. The contrast between dry aroma and wet aroma can be more informative than a long list of tasting adjectives.
- Around 5:00: Skim floating grounds and foam with a spoon. Skim lightly and do not scrape the bottom. This makes spoon tasting cleaner without removing the dissolved coffee that is already in the cup, and it reduces the chance that a large floating clump follows the spoon into your mouth.
- At 8:00: Begin tasting. Take two or three small sips from each cup, moving in the same order every time. Slurping is optional; drawing a little air across the coffee can spread aroma, but a quiet sip is still useful if slurping makes you tense or inconsistent.
- At 10:00: Make a final pass. Note what became clearer as the coffee cooled: acidity may seem more distinct, sweetness may either appear or fade, and a drying finish can become easier to detect. One sip at one temperature gives you a snapshot; two passes show how the cup behaves.
For a formal reference beside this home routine, compare your sheet with the SCA cupping protocol. Use it to understand the shared vocabulary and structure, then adapt the dose or number of cups to the equipment and space you actually have.
Five passes, five questions: aroma, acidity, sweetness, body, and finish
Tasting notes become useful when they answer a question. Do not try to announce a complete flavor map after one sip. Move through the cups in a fixed sequence and write down what is different before deciding whether the difference is desirable.
- Aroma: What does the dry coffee suggest, and what appears after the crust break? Record the change, such as cocoa becoming orange peel or a dry floral smell becoming a heavier fruit aroma.
- Acidity: How bright or tart is the cup? Acidity is the lively sensation associated with impressions such as citrus, stone fruit, or malic tartness. It is not automatically a flaw. Sharp sourness paired with a thin, short cup points more strongly toward under-extraction, while a well-developed bright coffee can taste vivid without tasting empty.
- Sweetness: Does the cup suggest caramel, ripe fruit, honey, or brown sugar, and does that impression remain as it cools? Sweetness is easier to judge next to another cup than in isolation.
- Body: How does the liquid feel on your tongue? Body comes from the amount and type of dissolved material, along with oils and suspended fine particles. A paper-filtered brew and an open-bowl cupping can therefore have different textures even when the coffee is the same.
- Finish: What remains after you swallow or spit? Note length, dryness, bitterness, sweetness, and whether the final impression is clean or cluttered.
Use a 0–5 intensity scale only inside this session. A score of 4 for acidity means the sample is more acidic than the samples beside it; it does not mean the coffee has achieved a universal quality grade. A simple note might read: A: citrus acidity 4, sweetness 3, body 2, clean finish 3. That forces you to describe the comparison rather than hide behind a single overall score.
When a flavor word does not come easily, check the World Coffee Research Sensory Lexicon as a vocabulary aid. The lexicon can help you separate orange from lemon, or cocoa from dark chocolate, but it cannot decide whether the difference suits your preferred brew method.
The confounder check: roast age, grind, water, and temperature
Bean quality is not the only thing in the bowl. Roast age, roast development, grinder behavior, water chemistry, and temperature can all present themselves as flavor differences. A clean comparison controls them first, then interprets the coffee.
Match post-roast age when possible. Degassing is the release of gas held in roasted coffee after roasting. Gas leaving the roasted coffee changes how easily water contacts the grounds and can change the cup's aroma. If the samples differ by more than about three days, write down each exact age and treat freshness as part of the result instead of pretending the cups are matched.
Grind the samples within a 3–5-minute window if practical. Weigh the beans before grinding and check the ground output afterward; a dose that disappears into grinder retention is not the dose that reached the cup. Fines migration, where very small particles move downward or remain suspended during agitation, can also make one bowl taste heavier and muddier than another.
Use the same water for every cup and keep it within the 92–96°C working range. Water chemistry means the dissolved mineral content and alkalinity of the water; those properties change how coffee material dissolves and can alter the way acidity is perceived. If water is the suspected variable, consult the SCA brewing-water quality guidance rather than changing beans and water at the same time.
Roast development changes solubility, meaning how readily the roasted material dissolves into water. A darker or more developed coffee may give up soluble material more readily, while a lighter coffee may need more energy from grind, temperature, or contact time. This is why the cleanest test is not necessarily the freshest coffee or the most expensive coffee; it is the sample tested under the most comparable conditions.
One bad cup? Rerun every sample before you blame the bean
Extraction is the movement of soluble coffee material into water. Under-extraction leaves some soluble material behind and often produces a sharp, thin, or hollow cup; over-extraction removes more of the less pleasant material and can produce bitterness, astringency, or a drying finish. These are starting diagnoses, not verdicts, because an unusually bright coffee can be tart even when the extraction is sound.
| What you taste | Mechanism to check first | One controlled rerun |
|---|---|---|
| Sharp sourness and a thin finish | Under-extraction, unless the coffee is naturally very bright | Make every cup one small grinder step finer or raise the water by 2–3°C; do not do both |
| Bitter, drying, or hollow beside a harsh finish | Over-extraction or an unusually high load of fines | Make every cup one small step coarser or lower the water by 2–3°C |
| Muddy texture and a cluttered finish | Fines migration or aggressive crust agitation | Skim more gently in every cup; if the texture remains, adjust the grind for every sample |
| One cup is dramatically unlike the others | Dose error, grinder retention, a delayed pour, or a crust broken at the wrong time | Recheck that bowl's ground mass and timing before changing the recipe |
Choose one adjustment for the rerun. A finer grind and hotter water can both increase extraction, but using both at once leaves you unable to tell which change mattered. The same logic applies to a suspected over-extracted cup: cooler water and a coarser grind both push in the opposite direction, so pick one.
Never adjust one bean alone when the goal is a fair side-by-side test. If sample B gets a finer grind while sample A stays unchanged, you are no longer comparing beans; you are comparing a bean and a recipe. The best first troubleshooting move is often a complete rerun with one shared change, not a more elaborate tasting vocabulary.
This distinction also explains why cupping does not need the same intervention as a pour-over. In a pour-over, the coffee bloom controls the first wetting and gas-release stage before the main pour. In an open bowl, all samples receive one immersion, so changing the crust break or skimming technique is the relevant control.
A 0–5 score is not the verdict: write the bean’s use case in one line
A useful record is short enough to complete while the cups are cooling. Write the bean name, origin or process if known, roast date, post-roast age, grind setting, water, dose, ratio, crust-break time, and the notes from each sensory pass. Include the grinder and water source if you expect to repeat the test later.
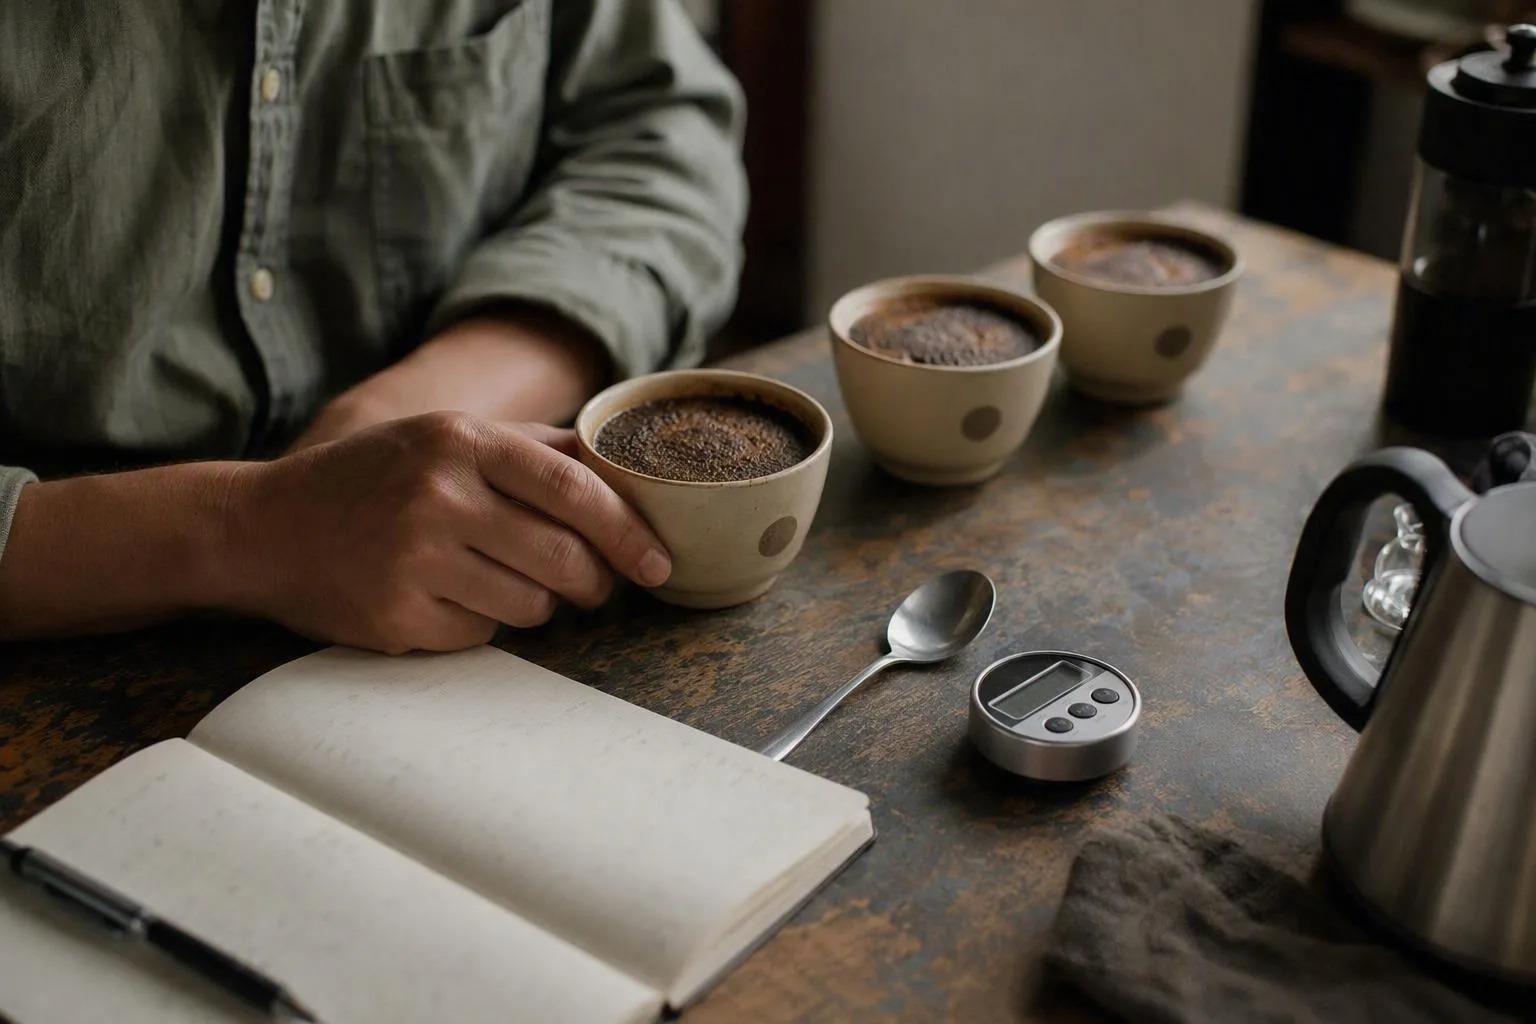
Keep the score separate from the conclusion. Imagine sample A is a washed, high-grown lot with citrus acidity 4, sweetness 3, body 2, and finish 3. Imagine sample B is a natural-process lot with a fruit-heavy aroma 4, acidity 3, sweetness 4, body 4, and finish 4. Those numbers are a worked illustration, not a prediction about every washed or natural coffee.
If the goal is a clean pour-over, sample A may be the more useful choice because its higher acidity and lighter body can keep the cup precise and bright. If the goal is a milk drink, sample B may be the stronger candidate because its heavier body and lower perceived acidity are more likely to remain distinct after milk is added. That is a use-case decision, not proof that B is a better coffee.
Do not collapse every attribute into one total. A coffee can rank first for aroma, second for sweetness, and last for body while still being the right choice for a particular brewer. Write one line such as: Choose A for a clear black pour-over; choose B for a fuller milk drink.
If roast development is the question, repeat the same ten-minute test after a seven-day interval. Keep the dose, water, grind, cup order, and timing unchanged, then compare the new sheet with the old one. The point is not to produce a permanent score; it is to see whether the cup’s balance moves as the coffee rests.
FAQ: three practical questions
What is the best roast age for coffee cupping?
There is no universal best rest day because roast level and process affect degassing. If you need a starting window for filter-oriented coffees, use roughly 5–14 days after roasting, then match the post-roast age across the samples. A coffee cupping that compares a five-day-old sample with a fourteen-day-old sample is partly a freshness test, whether you intended it or not.
Can you use a French press instead of a cupping bowl?
Yes, for a practical comparison, if every press uses the same 8.25 g dose, 150 g water, grind, and four-minute steep. The metal filter changes the result by retaining some oils and fines, so the texture will not reproduce an open-bowl cupping exactly. Use the French press when it is the tool you have, but label the method honestly on the score sheet.
How many coffees should you compare in one cupping session?
Two to four coffees is a manageable home range. Three samples fit this ten-minute routine well; larger flights make it harder to keep pouring, cooling, tasting order, and note-taking consistent. If your palate feels blurred, reduce the flight before changing the protocol.
The most transferable cupping result is not a grand winner. It is a controlled sentence: this bean has more citrus acidity, this one has heavier body, and this is the brewing situation where that difference matters.
Frequently Asked Questions
What is the best roast age for coffee cupping?
There is no universal rest day because roast level and process affect degassing; many home roasters use roughly 5–14 days after roasting as a starting window for filter coffee, but matching the post-roast age across samples matters more than choosing one magic number.
Can you use a French press instead of a cupping bowl?
Yes, for a practical comparison, if every press uses the same 8.25 g dose, 150 g water, grind, and 4-minute steep; the metal filter removes more oils and fines, so it will not reproduce the texture of an open-bowl cupping exactly.
How many coffees should you compare in one cupping session?
Two to four coffees is a manageable home range; three samples fit the 10-minute protocol well, while larger flights increase palate fatigue and make cooling and tasting order harder to keep consistent.