Turkish Coffee Pot Guide: Cezve Size, Heat, and Foam
A 60 mL cezve can make a dense, foamy cup; fill that same pot too high and it can boil over before the foam is ready. Choosing a Turkish coffee pot is mainly a capacity and heat-control decision, not a contest between copper and stainless steel.
The useful buying rule is simple: match the pot to the amount of water you actually brew, then choose the metal that gives you the clearest feedback on your stove. Shape helps, but the foam still depends on grind size, agitation, and when you remove the pot from heat.
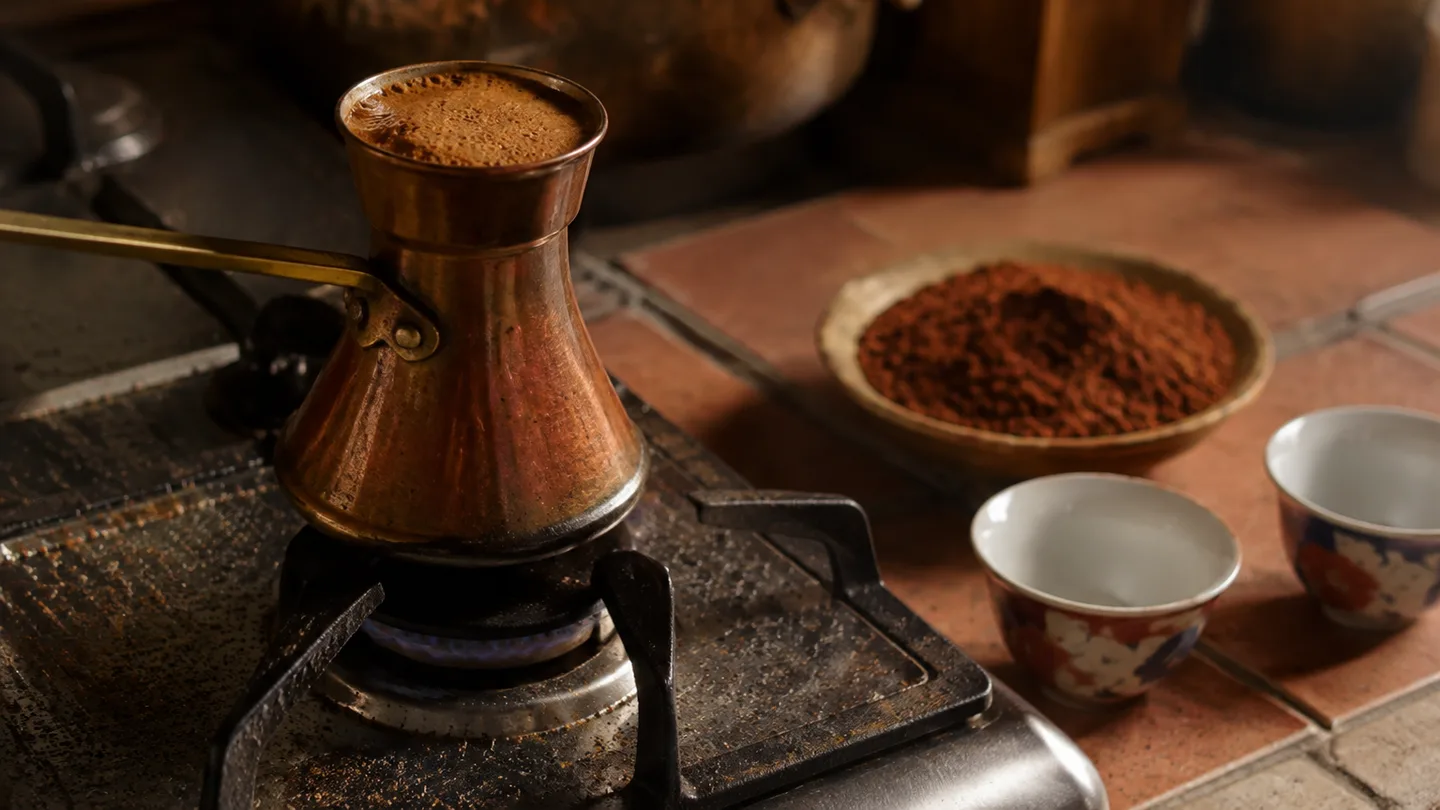
Cezve, ibrik, and the narrow neck: the pot is built around foam control
Cezve is the practical Turkish name for the small pot used to prepare this coffee. In English shopping listings, you will also see ibrik, a broader label that can overlap with cezve while sometimes referring to other pouring vessels. For a wider method overview, start with turkish coffee; this guide stays focused on the vessel and the variables it makes easier to control.
The useful anatomy is easy to spot. A cezve has a broad lower body, a narrower upper section, a long handle, and a pouring lip. The base gives the water and coffee enough surface area to heat, while the narrowing upper section gives the rising foam a smaller path to climb.
That neck creates a visible heat cue. As the foam ring rises toward it, you can see that the brew is close to boiling without waiting for a full rolling boil. The geometry improves control, but it cannot create foam by itself. Ultrafine coffee, a fresh enough roast, limited agitation, and gentle heat still do the physical work.
If you need to check the cultural terminology used by institutions, consult the UNESCO Intangible Cultural Heritage records and regional coffee associations for current wording. This guide uses cezve because it describes the working pot, not because one English label settles every regional variation.
Read the size label as 50–70 mL per serving, not as the safe fill line
Small cezve labels are easy to misread. A one-cup model usually refers to a small coffee serving rather than a household mug, so a practical starting band is roughly 50–70 mL of water per serving. Manufacturers vary, and the final drink will occupy less space once some water remains in the grounds and foam.
For a one-serving batch, think in the range of 60–70 mL. For two servings, 120–140 mL is a useful starting point. Those figures are a brewing charge, not permission to fill the pot all the way to the lip.
Leave about 20–30% headspace, with the liquid level below the narrow neck. The empty room gives the foam somewhere to rise before it reaches the edge. It also leaves you a margin for the brief expansion that happens as steam and bubbles build.
A much larger pot makes a tiny batch harder to read: the coffee sits low, the foam spreads across a wider surface, and the neck gives you a weaker visual signal. A cramped pot does the opposite. The foam reaches the lip quickly, so a small change in burner power can turn a controlled rise into a boilover.

When comparing nominal sizes, judge the vessel by its working water volume and neck shape. A decorative label such as one cup or two cups is only useful after you know what that maker counts as a cup.
Heat response follows the metal: copper gives feedback, stainless gives compatibility
Thin copper changes temperature quickly. On a small gas flame or a modest electric burner, that responsiveness makes the foam move in a way you can see almost immediately after turning the heat down or lifting the pot.
Stainless steel generally gives slower visual feedback because the wall and base hold heat differently. That is not a defect. The extra lag can make it forgiving during setup, while a magnetic stainless base is usually the straightforward choice for induction. An adapter can make other materials usable, but it adds another layer between the hob and the pot.
Tin-lined copper needs a lighter touch. Aggressive scouring and prolonged empty heating can damage or deform the lining, so use a soft cleaning method and avoid treating the empty cezve like a frying pan. If the lining is visibly worn, follow the maker’s care guidance before using it again.
The practical call here is to prioritize shape and batch size over metal for one or two servings on gas or standard electric heat. Choose copper when rapid feedback and traditional handling appeal to you; choose stainless when induction compatibility and simpler maintenance matter more. Neither material fixes an oversized batch or a late removal from heat.
Before the burner: start around 6–8 g of ultrafine coffee for 60–70 mL of water
Use mass if you can. A repeatable starting formula is approximately 6–8 g of ultrafine coffee for 60–70 g, or mL, of water per serving. A practical center point is 7 g of coffee with 65 g of water. Matched sensibly, that sits near a 1:8–1:10 coffee-to-water ratio.
Roast level, bean density, and the strength you want can move the dose within that band. If your grind is in doubt, compare it with a coffee grind size chart, but remember that Turkish coffee should be finer than ordinary espresso grinding: the particles are close to powder, with no coarse grit between your fingers.
The coffee to water ratio calculator is useful when you are scaling from one cup to two or three. Keep the calculation tied to the pot’s actual working capacity, because doubling the dose in a pot that cannot hold the extra foam defeats the arithmetic.
Start with cool or room-temperature water. It gives the heat a longer, easier-to-read ramp and helps the coffee wet evenly before extraction accelerates. If you use sugar, add it before heating so it dissolves throughout the batch rather than sitting in the bottom of the cup.
Stir once for roughly 5–10 seconds, just long enough to combine the coffee, water, and sugar if used. After that, leave the spoon out. The ultrafine grind has a very large surface area, so it extracts quickly and also leaves a settled layer of coffee at the bottom of the cup.
Heat until the foam lifts, not until the surface rolls
Start on low to medium heat. A one-serving batch commonly reaches its first foam rise in about 1.5–3 minutes. A two- or three-serving batch may take roughly 2–4 minutes, depending on burner power, pot material, and whether the water started cool or warm.
Those times are a bracket, not a target to force. Watch the surface. When the foam ring climbs toward the neck, remove the cezve before the surface begins a sustained rolling boil.
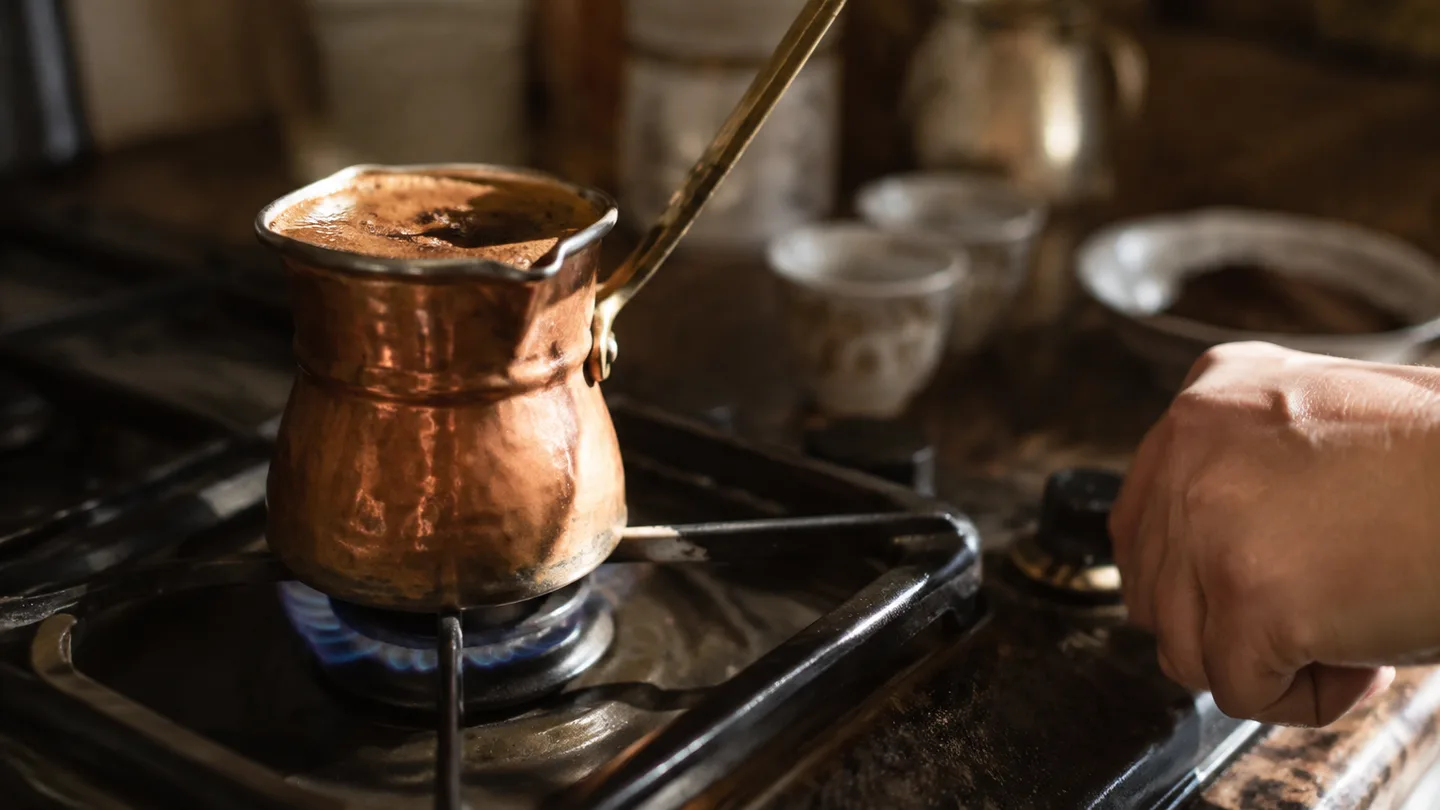
Vigorous convection and bursting steam bubbles break the foam cap as it forms. The same turbulence can push grounds and liquid over the rim, while the extra heat drives the brew toward a harsher, more roasted impression. A timer cannot rescue a pot that was filled past its useful headspace.
Some cooks use a brief second return to heat. If you choose that route, keep it short and remove the pot again as the foam lifts, rather than waiting for a second rolling boil. The trade-off is more time at high temperature and potentially more body, with less stable foam if the surface is allowed to break repeatedly.
The first adjustment worth making when the foam collapses is usually heat, not coffee dose. Lower the burner and lift the pot earlier on the next batch so you can see whether the foam survives the rise.
Foam is an extraction signal: stir once, stop agitating, and choose one or two rises
Foam is useful because it tells you what the heat is doing, but it is not a trophy that proves the cup will taste good. Fine suspended particles and dissolved coffee compounds help small bubbles hold together, while repeated stirring and boiling break the cap apart.
The best baseline is one initial stir followed by stillness. That distributes the powder and removes dry pockets, then lets the foam gather into a visible ring as the temperature climbs. Stirring during the rise adds turbulence exactly when the bubble structure is most fragile.
One rise gives the most stable foam and the clearest stopping point. A short second rise of roughly 10–20 seconds can make the cup feel heavier by keeping the coffee in contact with heat longer, but it makes foam control more difficult. Use the second rise when additional body matters more than a tall cap.
Spooning foam into the cups is optional. It helps when a shared batch has produced a generous cap and you want to divide it evenly before pouring the liquid. It is less useful when the foam is already collapsing; transferring it with a spoon will not repair overheating.
Pour in two or three passes so every cup gets foam, then wait 1–2 minutes
Pouring determines whether a shared batch tastes consistent from cup to cup. For one serving, use a steady, slow stream and stop before the last sediment-heavy liquid rushes out of the pot.
For two or more cups, first distribute a small amount into each cup. Repeat for a second pass, and use a third pass if the batch is large or the foam is uneven. Finish the fill across all cups instead of emptying the pot into the first cup and leaving the grounds and foam for the last one.

Keep the stream low and controlled. A fast pour can resuspend the grounds and mix the sediment into the drink before it has had time to settle. After filling, let the cups rest for about 1–2 minutes. That pause gives the fine particles time to collect at the bottom, which is why Turkish coffee is sipped rather than drained to the last drop.
The decision table: match pot size and heat to the symptom, not the decoration
Before changing the pot, run one repeatable baseline. Weigh the water and coffee, use the same burner setting, stop at the same foam cue, and pour the same way. Change one variable at a time so a new cezve does not get blamed for a dose, grind, or heat change that happened alongside it.
Run one baseline batch before changing the pot
- Measure 65 g of water and 7 g of ultrafine coffee.
- Add sugar before heating if you use it, then stir for 5–10 seconds.
- Heat on low to medium and remove the pot at the first clear foam rise.
- Pour slowly, rest the cup, and record whether the foam, strength, and sediment look balanced.
That small protocol turns a vague buying question into a controlled comparison. If the cup is bitter, the site’s why is my coffee bitter guide can help separate heat damage from dose and grind problems, but the pot table below gives you the first check.
| Symptom | Likely mechanism | First adjustment |
|---|---|---|
| Foam collapses | Excessive heat, late agitation, or a sustained boil broke the bubble cap. | Lower the heat, stop stirring, and remove the cezve earlier. |
| Boilover | The batch is too large for the pot’s headspace, or the vessel is undersized. | Reduce the batch or move up one pot size. |
| Weak or thin coffee | Too much water or an overly coarse grind reduced concentration and extraction. | Return to the starting ratio, then move finer if needed. |
| Bitter or ashy coffee | Sustained boiling or excessive heat pushed the brew past the useful rise. | Stop at the first rise before changing the dose. |
| Uneven cups | A single fast pour left foam and sediment unevenly distributed. | Use two or three slow passes. |
For one or two home servings, choose the smallest narrow-neck pot that leaves a clear gap below the neck during brewing. On induction, choose a magnetic-base stainless model or use an adapter approved for the hob. On other stoves, let the pot’s size and the clarity of its heat response guide the decision; the foam cue matters more than the decoration.